On-device Text Recognition on iOS with SwiftUI
Detailed guide how to do on-device OCR on iOS with SwiftUI
One of the greatest powers of Apple’s iOS platform is the diversity of built-in frameworks. There are many gems to be found which provide easy-to-use but advanced functionality. One of these examples is the Vision framework which was introduced in iOS 11.
The goal we want to achieve in this tutorial is to implement an on-device text recognition app, which allows our code to work even without internet connection. In addition we want to be able to scan documents right from our camera feed and extract the text from there. If you think this will require a complex dark-magic machine-learning masterplan you will be proven wrong by the end of this article.
All of the work we’ll be doing uses built-in functionality available in iOS. We will also incorporate SwiftUI into our little project because it’s hip and cool (if you haven’t tried it: trust me on this one). So without further ado - let’s jump right in.
(Note: the entire code is also available in this repository on my Github)
Setting up our project
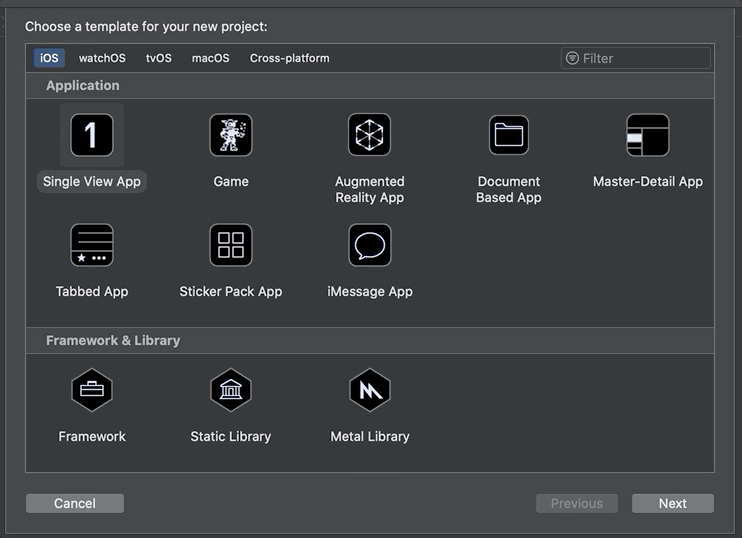
The first thing to do is to open up Xcode and creating a new project. We select Single View App and give it a nice, modern, startup-like name such as “Text Recognition Sample”. It is important to select SwiftUI for the User Interface.
I will not go into too much detail about the project structure here as I assume you have basic knowledge of SwiftUI. If not, there are plenty of great tutorials out there either from Apple directly or in this list by Paul Hudson.
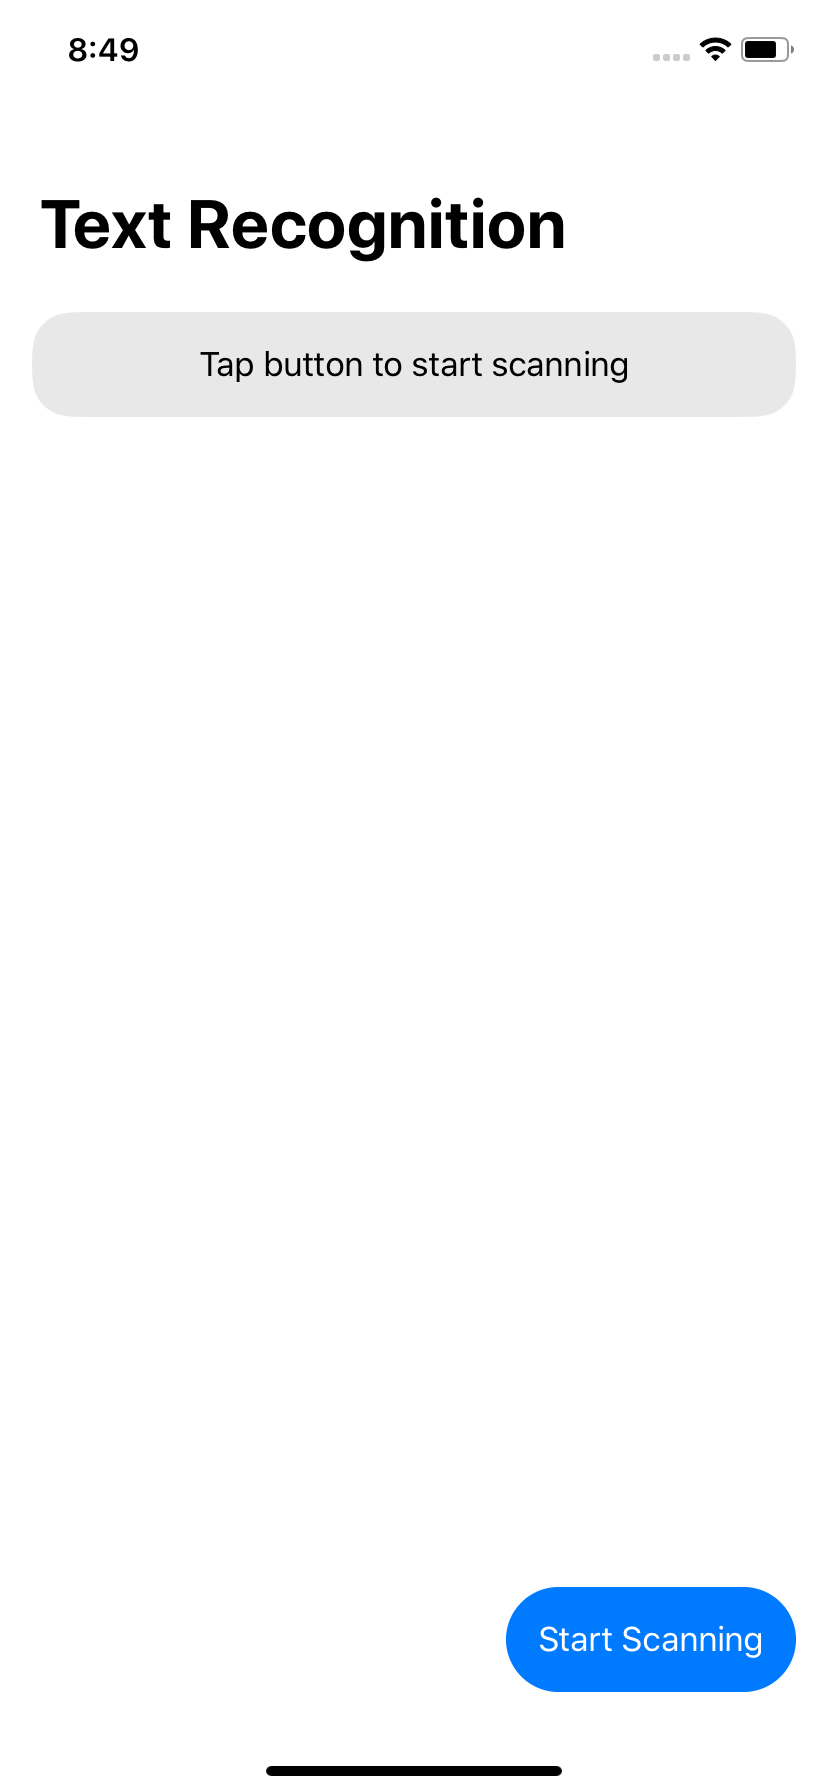
We are going to build a basic UI focused on functionality. This means that we wrap a Text element inside of a ScrollView (because we might scan a LOT of text) and a Button to start scanning. This means that our body (with a little styling) will be:
NavigationView {
    VStack {
        ScrollView {
            ZStack {
                RoundedRectangle(cornerRadius: 20, style: .continuous)
                    .fill(Color.gray.opacity(0.2))

                Text(recognizedText)
                    .padding()
            }
            .padding()
        }

        Spacer()

        HStack {
            Spacer()

            Button(action: {
                // start scanning
            }) {
                Text("Start Scanning")
            }
            .padding()
            .foregroundColor(.white)
            .background(Capsule().fill(Color.blue))
        }
        .padding()
    }
    .navigationBarTitle("Text Recognition")
}
There are two things to mention here. First is that we haven’t implemented the functionality of the Button yet. Rather we used a placeholder comment of // start scanning here. Second, the Text element uses a variable. In order to be able to change the content of our View we need to create a State property which we call recognizedText:
@State private var recognizedText = "Tap button to start scanning."The idea is that we can hand this to the view that is doing the scanning. Since it is a Binding it allows it to manipulate the String. Therefore we make sure we have a consistent flow of data. If you want to know more about data flow in SwiftUI I can highly recommend this video from WWDC 2019. Our UI is done and looks like this:
Setup the scanning with VisionKit
The next step is to setup our text recognition workflow. VisionKit is “a small framework that lets your app use the system’s document scanner”. It is super powerful and comes in as a full-blown ViewController with the short and catchy name VNDocumentCameraViewController and its dear friend VNDocumentCameraViewControllerDelegate (Yes, Apple loves long names. As proof just check out this wonderful repository).
As you might have noticed this has the term ViewController in it which implies that it comes from UIKit. Therefore we need to build a little bridge to incorporate it in our SwiftUI code. Fortunately this is quite easy with the use of UIViewControllerRepresantable.
We will create a new Swift file called “ScanDocumentView” and replace the Foundation import with imports for SwiftUI and VisionKit. Then we create a Struct called ScanDocumentView conforming to UIViewControllerRepresentable . In order to fulfill the requirements we can use a little trick. Just add the following line:
typealias UIViewControllerType = VNDocumentCameraViewControllerIf you allow Xcode to add the protocol stubs it will automatically use the correct types and saves you quite some tedious typing work. After this we can remove the abovementioned typealias and the placeholders to have the following code in our file so far:
import SwiftUI
import VisionKit

struct ScanDocumentView: UIViewControllerRepresentable {
    func makeUIViewController(context: Context) -> VNDocumentCameraViewController {
        // to implement
    }

    func updateUIViewController(_ uiViewController: VNDocumentCameraViewController, context: Context) {
        // nothing to do here
    }

}
We still have an error because we have not yet implemented the required Coordinator to respond to events from the VNDocumentCameraViewController. We will fix this now. But first, we need to think about the steps to be taken. In order to bridge the delegate methods from the ViewController without SwiftUI code we need to create a Coordinator. This will allow us to respond to the didFinishWithScan delegate method of the VNDocumentCameraViewControllerDelegate and start with the next step of our pipeline.
Next we hand a Binding that will automatically be updated when the processing has finished. It also needs a reference to its parent. Therefore our Coordinator can be created inside our ScanDocumentView struct and initially looks like this:
class Coordinator: NSObject, VNDocumentCameraViewControllerDelegate {
    var recognizedText: Binding<String>
    var parent: ScanDocumentView

    init(recognizedText: Binding<String>, parent: ScanDocumentView) {
        self.recognizedText = recognizedText
        self.parent = parent
    }

    func documentCameraViewController(_ controller: VNDocumentCameraViewController, didFinishWith scan: VNDocumentCameraScan) {
        // do the processing of the scan
    }
}
We need to use that Coordinator in the makeUIViewController method with only three lines of code:
let documentViewController = VNDocumentCameraViewController()
documentViewController.delegate = context.coordinator
return documentViewController
There are two missing pieces in our Struct right now. First, we need to create our coordinator somewhere. Second, in order to extract text the Vision framework needs to come into play and do its magic.
We add a makeCoordinator function and a property for our recognizedText binding. Let’s add both of that to our ScanDocumentView struct:
@Binding var recognizedText: String

func makeCoordinator() -> Coordinator {
    Coordinator(recognizedText: $recognizedText, parent: self)
}
We will incorporate the Vision magic in a second but first we want to call the scanning ViewController as it is already fully functional and quite impressive to use. So let’s head back to ContentView and open it up.
Showing the ScanDocumentView
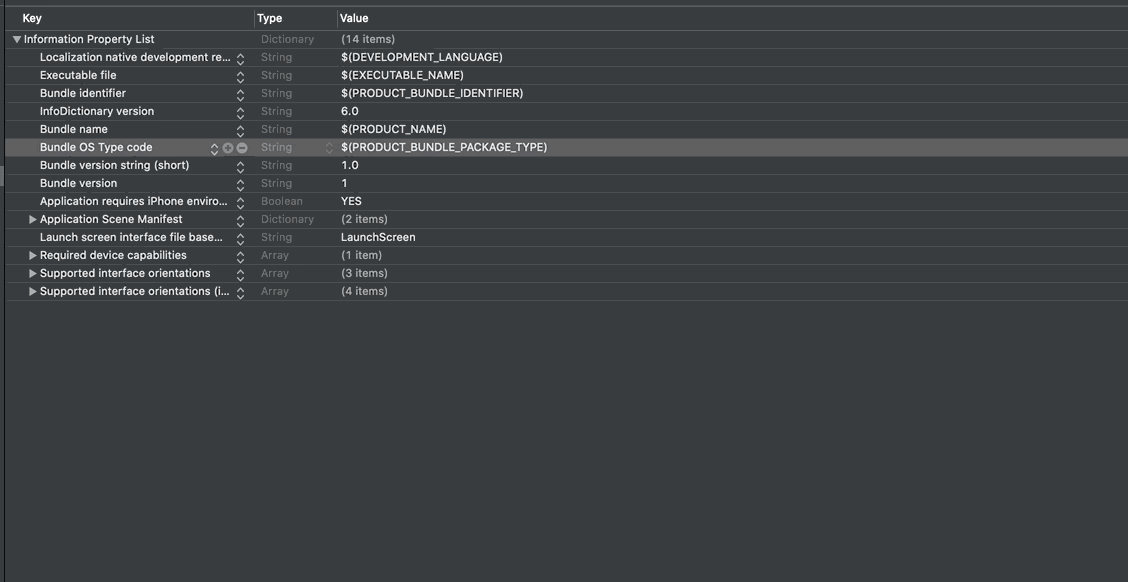
There are multiple ways to present the ScanDocumentView but regardless of which one to use we need to first provide a reason for accessing the user’s camera. Therefore we open up the Info.plist file and right-click below the entries and select Add row. As a key we enter Privacy - Camera Usage Description and add a meaningful description such as “We need to use the camera to scan documents”.
This will create a prompt for the user upon first use asking for allowance. With that we can finally build up the rest of our UI. It might be surprising to see how little work is necessary in order to do this.
We will use a sheet that will slide in from the bottom and show the scanning UI and slide back down when we are finished. This is really easy to achieve but first we add another State property to determined whether the sheet is shown or not. Add this below our previous property in ContentView:
@State private var showingScanningView = falseIn order to present a sheet we apply a modifier to our outermost VStack. Afterward we can add the following snippet right underneath our navigationBarTitle modifier:
.sheet(isPresented: $showingScanningView) {
    ScanDocumentView(recognizedText: self.$recognizedText)
}
The final step is to replace the comment (// start scanning) of our Button to set the showingScanningView state to true:
self.showingScanningView = trueLaunch the app and you will be able to scan documents. It uses the beautiful UI of the system’s native document scanner and allows us to already extract data from your camera feed. All of this can be achieved in ~80 lines of code including some UI improvements.
Now for the last part of text recognition, we can finally add the Vision framework so let’s do it.
Recognizing text with Vision
If we scan a document and hit the Save button right now nothing happens. This makes sense since we only included a skeleton for the didFinishWithScan delegate method in our Coordinator of ScanDocumentView with an empty body.
Again, we need to think about what we want to achieve. The object that we receive from the scan is of type VNDocumentCameraScan. According to the documentation it will have the number of pages (pageCount) and a helper method to get an image of the page at a certain index (imageOfPage(at: Int)). Therefore we will create an array of images containing all the scanned documents.
This array can be fed into the VNRecognizeTextRequest which is a Vision class to handle text recognition. For each of these pages we will extract the text, add that up, and finally replace our recognizedText binding with that text.
Next, we enhance our Coordinator to be able to extract the images. Adding a helper function will help us separate that logic:
fileprivate func extractImages(from scan: VNDocumentCameraScan) -> [CGImage] {
    var extractedImages = [CGImage]()
    for index in 0..<scan.pageCount {
        let extractedImage = scan.imageOfPage(at: index)
        guard let cgImage = extractedImage.cgImage else { continue }

        extractedImages.append(cgImage)
    }
    return extractedImages
}
The reason we use CGImage here is that it is the required format for the next step in our pipeline.
Next, we will get into the essential part of this tutorial - recognizing text.
Due to its complexity we break down the recognizing function in several parts:
- We will create a variable called
entireRecognizedTextwhere the captured text will be stored - We define a
VNRecognizeTextRequestwith a completion handler and therecognitionLevelset to.accurate(instead of the.fastoption that can be used for realtime applications) - Once it is processed we will extract the single best candidate from all observations given to the request
- We append it to the
entireRecognizedTextvariable - We iterate over all images and create and perform a
VNImageRequestHandlerwith our previously created request
So here we go:
fileprivate func recognizeText(from images: [CGImage]) -> String {
    var entireRecognizedText = ""
    let recognizeTextRequest = VNRecognizeTextRequest { (request, error) in
        guard error == nil else { return }

        guard let observations = request.results as? [VNRecognizedTextObservation] else { return }

        let maximumRecognitionCandidates = 1
        for observation in observations {
            guard let candidate = observation.topCandidates(maximumRecognitionCandidates).first else { continue }

            entireRecognizedText += "\(candidate.string)\n"

        }
    }
    recognizeTextRequest.recognitionLevel = .accurate

    for image in images {
        let requestHandler = VNImageRequestHandler(cgImage: image, options: [:])

        try? requestHandler.perform([recognizeTextRequest])
    }

    return entireRecognizedText
}
We return our recognized text so we need to concatenate our two functions inside of the didFinishWithScan delegate method. With only three lines of code we can extract the images from the scan, perform the text recognition, and set the result to our String binding variable called recognizedText.
let extractedImages = extractImages(from: scan)
let processedText = recognizeText(from: extractedImages)
recognizedText.wrappedValue = processedText
Closing the bottom sheet
If we run the app now we will still see…nothing. Hitting the “Save” button will still not result in any changes. I can guarantee you that our code works - we only need to close the bottom sheet that we opened up. In order to do that we need to make use of an @Environment variable called \.presentationMode.
This allows us to close the sheet and give our little app the final functionality it needs. At the top of our ScanDocumentView struct we need to add the following property:
@Environment(\.presentationMode) var presentationModeIn our Coordinator below the last line of our didFinishWithScan method we need to call the dismiss() function:
parent.presentationMode.wrappedValue.dismiss()Now you can run the app on a real device and see the full magic we created.
Summary
The Vision framework enables us to build powerful Computer Vision features into our apps without any prior domain knowledge. You do not have to be a computer vision professional in order to do text recognition on iOS.
Furthermore it is amazing that this is running solely on device. There is no need for an internet connection and it is also blazing fast. The demo video is running on an iPhone 8 which was released 3.5 years ago. On more modern devices it’s even much faster.
I encourage you to try it out yourself. You can also take a look at the entire repository over at my Github. I think the capabilities Apple introduced with the Vision framework are incredible and combined with SwiftUI it is a lot of fun to implement.
If you are interested in how you can use machine learning on iOS and other platforms feel free to contact me or comment on this article. You can also connect with me on Twitter or LinkedIn. Thanks a lot for following this article.